Bootstrap Textarea Group
Intro
Inside the pages we create we operate the form elements in order to receive some details directly from the site visitors and return it back to the internet site owner fulfilling several objectives. To carry out it correctly-- meaning getting the right responses, the appropriate questions must be questioned so we architect out forms system properly, consider all the attainable cases and forms of relevant information needed and actually presented.
Yet despite of how correct we operate in this, there certainly constantly are some situations when the relevant information we want from the user is instead blurry just before it becomes really delivered and requires to extend over much more than simply the standard a single or else a handful of words normally written in the input fields. That is really where the # element arrives in-- it is certainly the irreplaceable and only element where the site visitors may freely write back some lines giving a comments, providing a good reason for their activities or just a handful of thoughts to perhaps aid us producing the product or service the page is about much better. ( click this link)
The best way to employ the Bootstrap textarea:
Inside the latest edition of one of the most favored responsive framework-- Bootstrap 4 the Bootstrap Textarea Group feature is fully supported instantly adapting to the width of the display webpage becomes displayed on.
Producing it is pretty uncomplicated - everything you require is a parent wrapper
<div>.form-grouplabel<textarea>for = “ - the textarea ID - "Next we require to produce the
<textarea>.form-controlfor = ""<label><textarea>rows=" ~ number ~ "<textarea>Due to the fact that this is really a responsive feature by default it spreads out the whole size of its parent component.
Extra hints
On the other side of coin-- there are a number of instances you might need to control the responses provided inside a
<textbox>maxlenght = " ~ some number here ~ "As an examples
Bootstrap's form manages expand on Rebooted form styles with classes. Use these particular classes to opt in their modified displays for a even more regular rendering across tools and browsers . The example form below indicates usual HTML form elements that receive up-dated looks from Bootstrap with additional classes.
Just remember, due to the fact that Bootstrap employs the HTML5 doctype, all of inputs ought to have a
type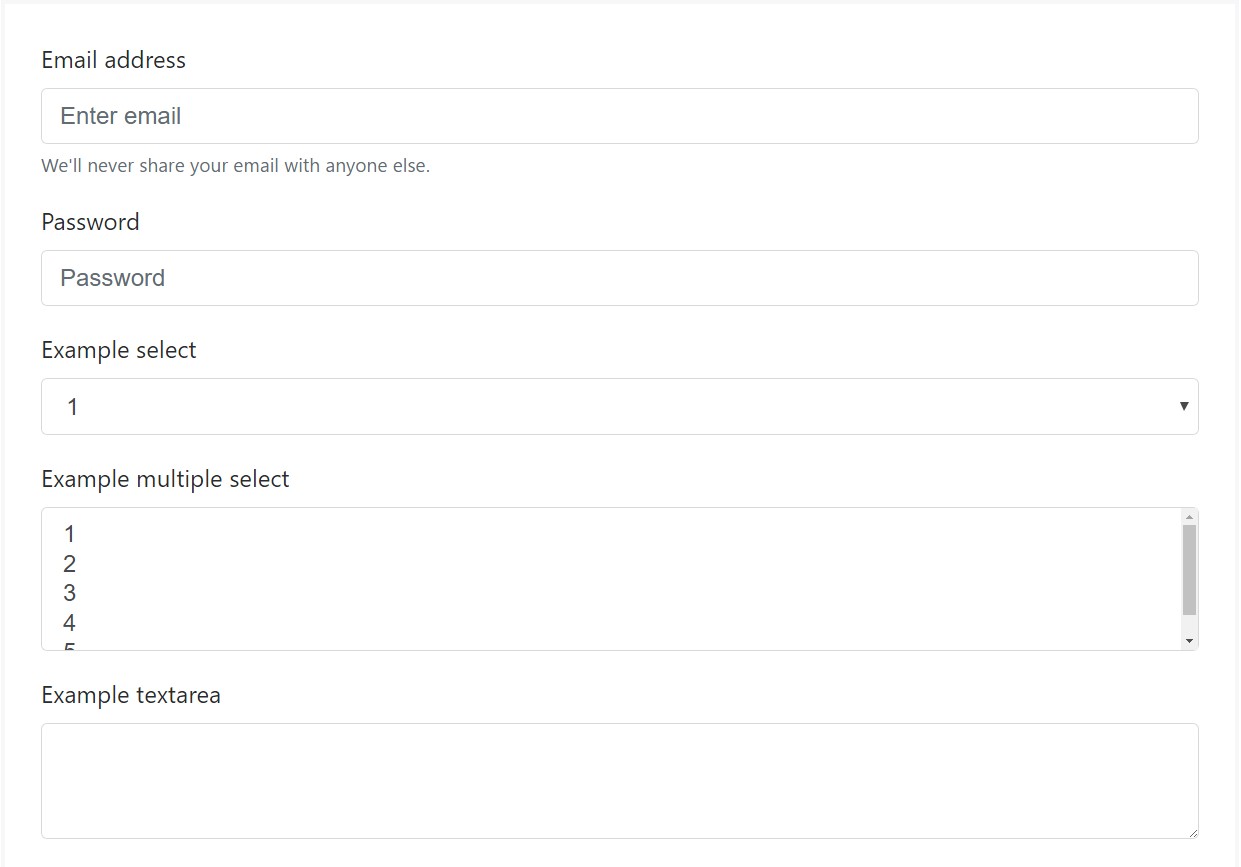
<form>
<div class="form-group">
<label for="exampleInputEmail1">Email address</label>
<input type="email" class="form-control" id="exampleInputEmail1" aria-describedby="emailHelp" placeholder="Enter email">
<small id="emailHelp" class="form-text text-muted">We'll never share your email with anyone else.</small>
</div>
<div class="form-group">
<label for="exampleInputPassword1">Password</label>
<input type="password" class="form-control" id="exampleInputPassword1" placeholder="Password">
</div>
<div class="form-group">
<label for="exampleSelect1">Example select</label>
<select class="form-control" id="exampleSelect1">
<option>1</option>
<option>2</option>
<option>3</option>
<option>4</option>
<option>5</option>
</select>
</div>
<div class="form-group">
<label for="exampleSelect2">Example multiple select</label>
<select multiple class="form-control" id="exampleSelect2">
<option>1</option>
<option>2</option>
<option>3</option>
<option>4</option>
<option>5</option>
</select>
</div>
<div class="form-group">
<label for="exampleTextarea">Example textarea</label>
<textarea class="form-control" id="exampleTextarea" rows="3"></textarea>
</div>
<div class="form-group">
<label for="exampleInputFile">File input</label>
<input type="file" class="form-control-file" id="exampleInputFile" aria-describedby="fileHelp">
<small id="fileHelp" class="form-text text-muted">This is some placeholder block-level help text for the above input. It's a bit lighter and easily wraps to a new line.</small>
</div>
<fieldset class="form-group">
<legend>Radio buttons</legend>
<div class="form-check">
<label class="form-check-label">
<input type="radio" class="form-check-input" name="optionsRadios" id="optionsRadios1" value="option1" checked>
Option one is this and that—be sure to include why it's great
</label>
</div>
<div class="form-check">
<label class="form-check-label">
<input type="radio" class="form-check-input" name="optionsRadios" id="optionsRadios2" value="option2">
Option two can be something else and selecting it will deselect option one
</label>
</div>
<div class="form-check disabled">
<label class="form-check-label">
<input type="radio" class="form-check-input" name="optionsRadios" id="optionsRadios3" value="option3" disabled>
Option three is disabled
</label>
</div>
</fieldset>
<div class="form-check">
<label class="form-check-label">
<input type="checkbox" class="form-check-input">
Check me out
</label>
</div>
<button type="submit" class="btn btn-primary">Submit</button>
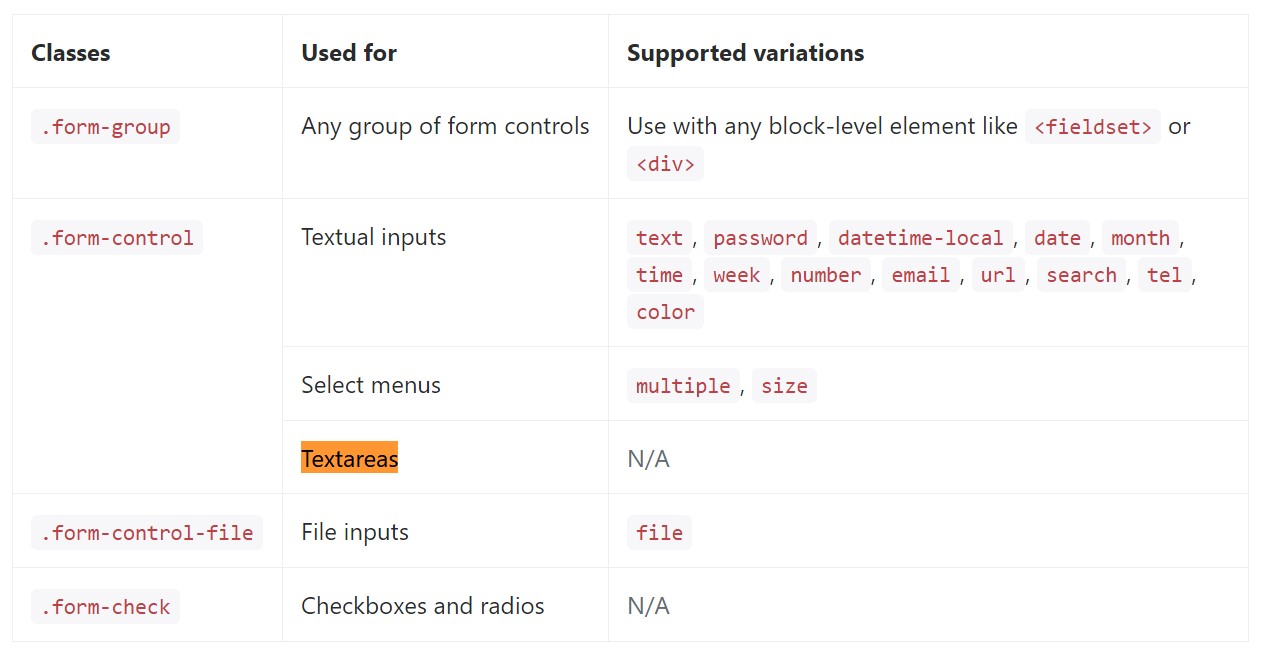
</form>Listed below is simply a full listing of the particular form regulations supported simply by Bootstrap and the classes that customize them. Additional documentation is accessible for each group.
Conclusions
And so right now you learn exactly how to develop a
<textarea>Look at some video guide relating to Bootstrap Textarea Modal:
Linked topics:
Fundamentals of the textarea
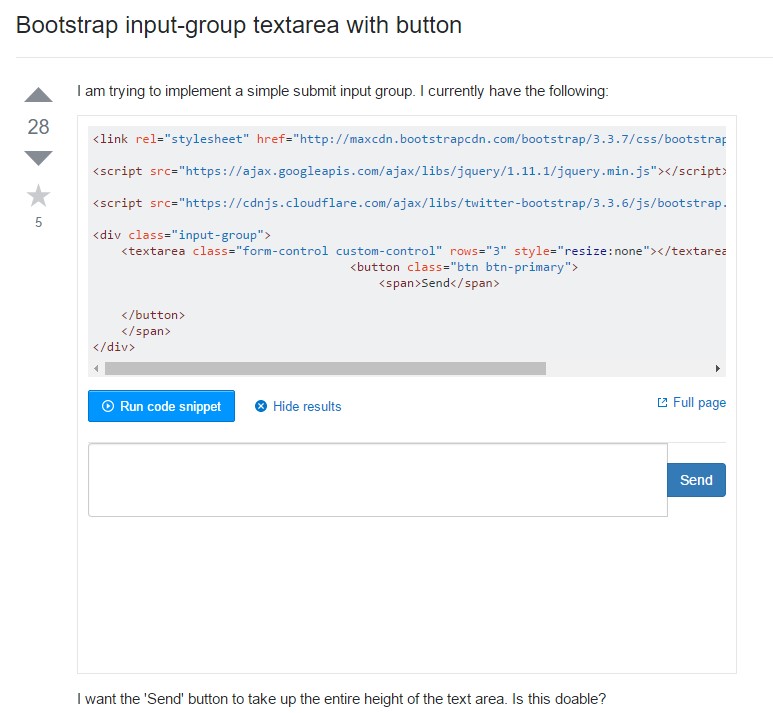
Bootstrap input-group Textarea button using
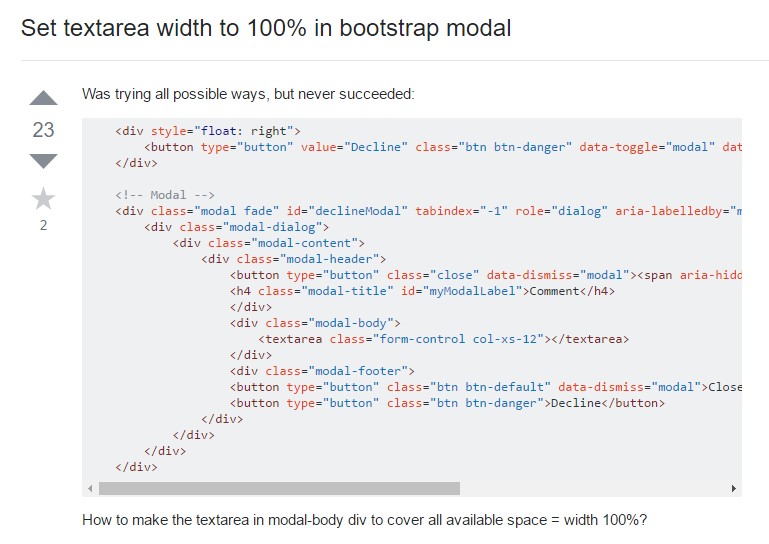
Create Textarea size to 100% in Bootstrap modal